

Cart is empty. Please go to your home page for listing it.
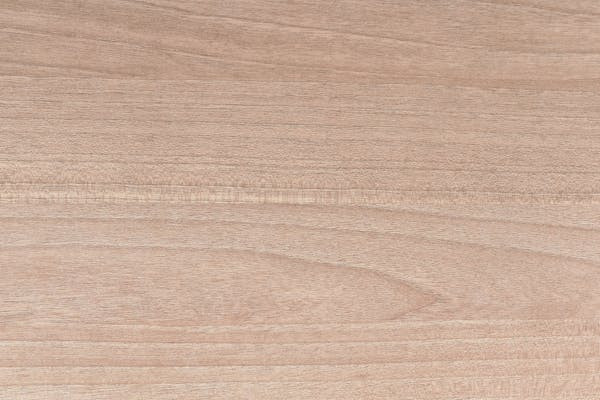

Vinyl Wood Flooring has become a popular choice in homes and commercial spaces, thanks to its aesthetic appeal, durability, and cost-effectiveness. Designed to replicate the beauty of natural wood while offering enhanced practicality, vinyl wood flooring is resistant to many forms of wear and tear. However, as with any surface exposed to regular use, it isn’t immune to minor scratches and scuffs.
Even the most durable vinyl wood flooring can show signs of wear over time, especially in high-traffic areas or households with pets, children, or heavy furniture. The good news is that repairing scratches and scuffs on vinyl wood flooring is often straightforward and can restore your floors to their former glory without the need for costly replacements.
In this guide, we’ll walk you through the causes of scratches, simple DIY techniques for repairing them, and tips to maintain your flooring for the long run.
Before diving into repair techniques, it’s helpful to understand why vinyl wood flooring might develop scratches or scuffs in the first place. Vinyl wood flooring is typically made of multiple layers, including a wear layer on the top that protects the printed design underneath. While the wear layer is designed to resist damage, it is not entirely impervious to scratches.
Common Causes of Scratches and Scuffs:
Furniture Movement: Sliding furniture without protective padding can leave unsightly marks on the surface.
Foot Traffic: High-traffic areas are more prone to wear, especially if people wear shoes with abrasive soles.
Pet Claws: Energetic pets with untrimmed claws can scratch the surface over time.
Dropped Objects: Accidental drops of sharp or heavy objects may leave dents or scratches.
Cleaning Tools: Using rough scrubbers or abrasive cleaning products can damage the finish of the flooring.
While these issues can seem daunting, they are often minor and can be effectively addressed with the right tools and techniques.
Here’s a detailed breakdown of how to tackle scratches and scuffs based on their severity:
1. Assess the Damage:
Surface Scuffs: These are light marks that don’t penetrate the wear layer. They’re often caused by shoes, rubber, or furniture and can be buffed out easily.
Minor Scratches: These penetrate the top layer but don’t reach the printed design layer.
Deep Scratches: These extend through multiple layers and may require more intensive repair techniques.
2. Gather Your Supplies: Depending on the extent of the damage, you may need the following:
A soft cloth or microfiber towel
Mild soap or vinyl floor cleaner
Rubber eraser or tennis ball
Vinyl floor repair kit
Wax stick or crayon matching the flooring color
Sandpaper (fine-grit) or scuff remover pad
Polyurethane sealer or floor polish
3. Repairing Surface Scuffs: Surface scuffs are often the easiest to fix, requiring minimal effort:
Clean the Area: Start by wiping the scuffed area with a soft cloth and a mixture of mild soap and water. Remove any dirt or debris.
Use a Rubber Eraser or Tennis Ball: Gently rub the scuff with a clean rubber eraser or the felted side of a tennis ball. This method can lift light scuff marks.
Buff the Area: Once the scuff is removed, buff the surface with a dry microfiber cloth for a polished look.
4. Repairing Minor Scratches: For scratches that penetrate the wear layer:
Clean and Dry the Scratch: Ensure the area is free of dirt and completely dry before proceeding.
Apply a Wax Stick or Crayon: Use a wax repair stick or crayon that matches the color of your vinyl wood flooring. Gently fill the scratch by rubbing the wax directly into it.
Smooth and Blend: Use a soft cloth or your finger to smooth out the wax and blend it with the surrounding area.
Seal the Surface: Apply a small amount of polyurethane sealer to protect the repair and restore the shine.
5. Repairing Deep Scratches: Deep scratches require a more involved approach:
Use a Vinyl Floor Repair Kit: These kits are readily available and typically include a compound that can fill deeper scratches.
Clean the Area: Wipe the scratch clean with a damp cloth and allow it to dry.
Apply the Repair Compound: Follow the instructions provided with the repair kit. Use the applicator to fill the scratch with the compound.
Level and Smooth: After the compound sets, level it with a fine-grit sandpaper or a smoothing tool to ensure it’s flush with the surface.
Finish with a Sealer: Apply a protective sealer or polish to restore the shine and durability of the flooring.
6. Replacing Damaged Planks: For severe damage that cannot be repaired, replacing the affected plank may be the best solution. Fortunately, many vinyl wood flooring systems are designed for easy plank replacement:
Identify the Damaged Plank: Carefully remove the surrounding planks if your flooring is interlocking or glue-down.
Install a New Plank: Replace the damaged piece with a new one, ensuring it matches the rest of the flooring.
Once you’ve repaired your vinyl wood flooring, it’s essential to take preventive measures to maintain its pristine condition:
Use Furniture Pads: Attach felt or rubber pads to the legs of chairs, tables, and other heavy furniture to prevent scratches when moved.
Trim Pet Nails: Regularly trim your pet’s nails to reduce the risk of claw marks on your flooring.
Use Rugs and Mats: Place area rugs or mats in high-traffic areas, such as entryways and hallways, to minimize wear.
Avoid Harsh Cleaning Tools: Use soft mops and non-abrasive cleaners specifically designed for vinyl wood flooring.
Lift, Don’t Drag: When moving furniture or heavy objects, lift them instead of dragging them across the floor.
Regular Maintenance: Sweep or vacuum regularly to remove dirt and debris that could scratch the surface. Apply a floor polish occasionally to maintain the protective layer.
Despite the occasional scratch or scuff, vinyl wood flooring remains a favored choice for its many benefits:
Cost-Effective: Affordable yet elegant, it mimics the look of hardwood without the high price tag.
Durability: With proper care, vinyl wood flooring can withstand years of use.
Variety: Available in a wide range of colors and patterns, it suits various interior styles.
Water Resistance: Ideal for areas prone to moisture, such as kitchens and bathrooms.
By addressing minor damages promptly and adopting preventive practices, you can extend the life and beauty of your vinyl wood flooring.
In conclusion, repairing scratches and scuffs on vinyl wood flooring doesn’t have to be a daunting task. With the right tools, techniques, and preventive measures, you can keep your floors looking as good as new for years to come. Whether it’s a light scuff or a deep scratch, this guide empowers you to tackle any imperfection with confidence and ease.
As a PVC industry leader, we offer more than just PVC flooring products – consultation, installation, maintenance, and a customer-centric approach emphasizing honesty, transparency, and exceptional service
0 COMMENTS